


Table of contents
In the last episode: Episode 1: Unveiling docker core concepts, we look at what docker is and how it is an isolated and lightweight process in the host machine. Now it's time to roll up your sleeves and start building containers.
Let's install Docker
Visit the official docker website: https://docs.docker.com/get-docker/
Follow the commands from there for your respective machine
Verify installation by running
dockerin the terminal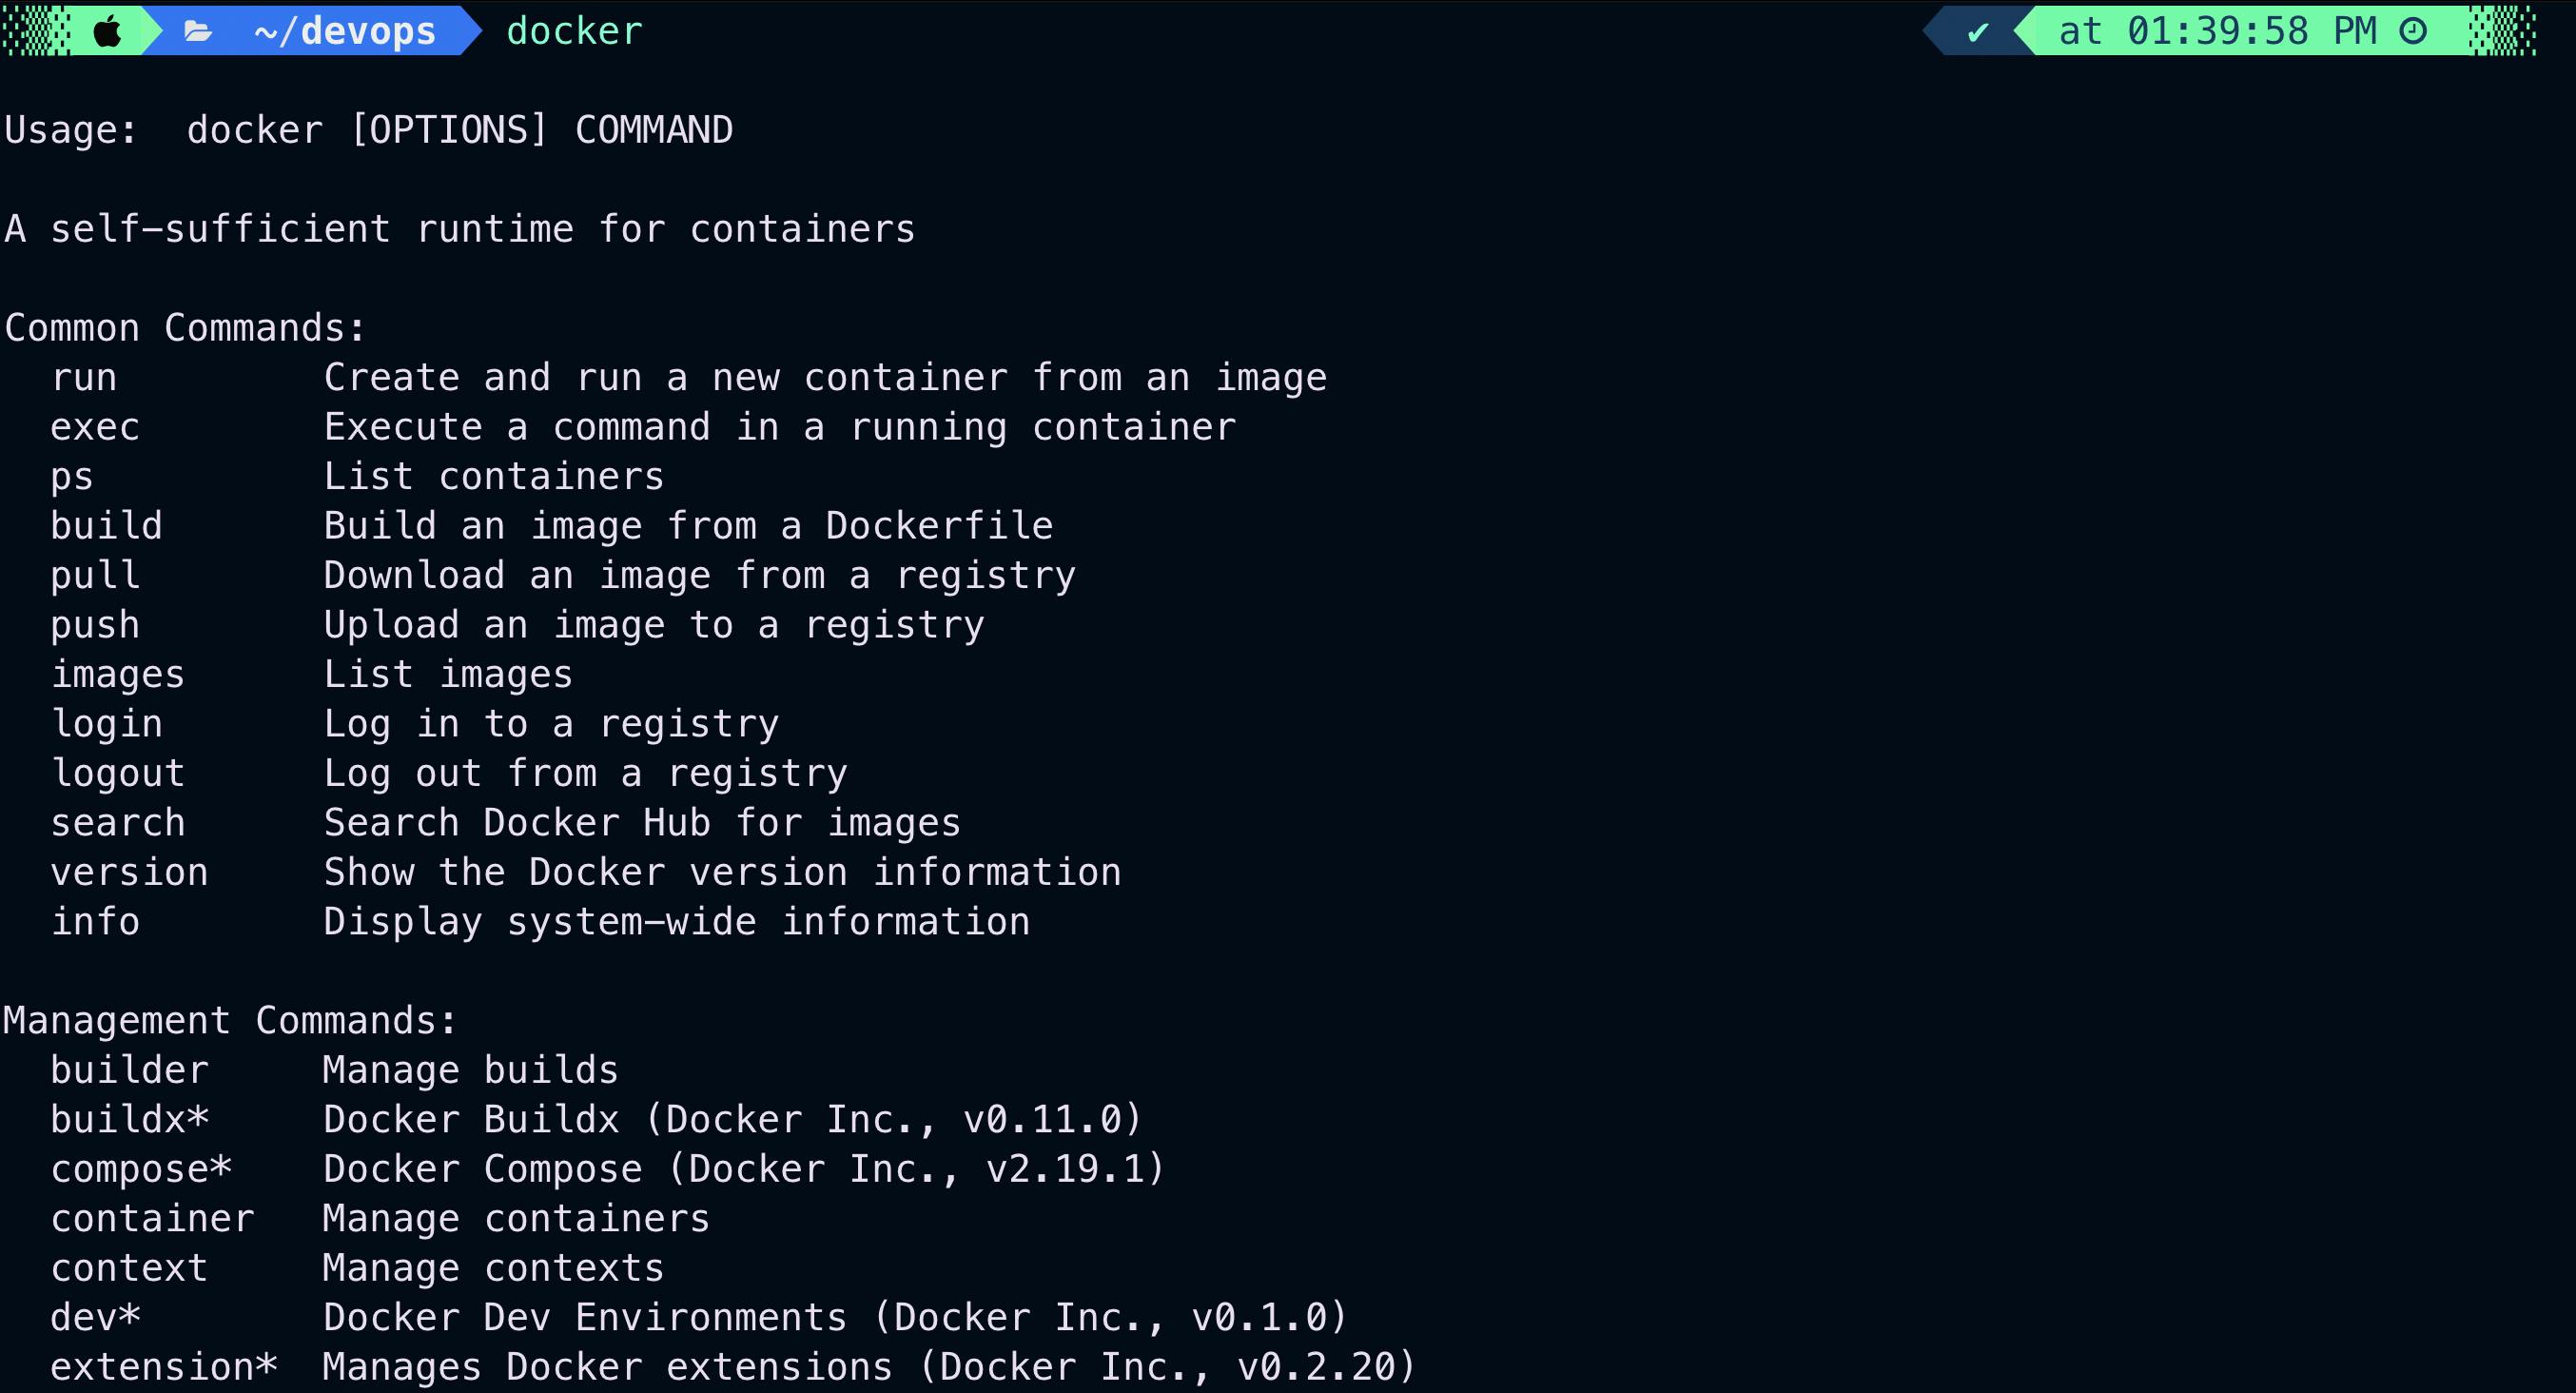 💡Congratulations! You successfully installed docker on your system 🎉
Docker architecture
- Docker follows a client-server architecture i.e. Client( Docker CLI ) sends a request to Server( Docker Daemon ).
docker version
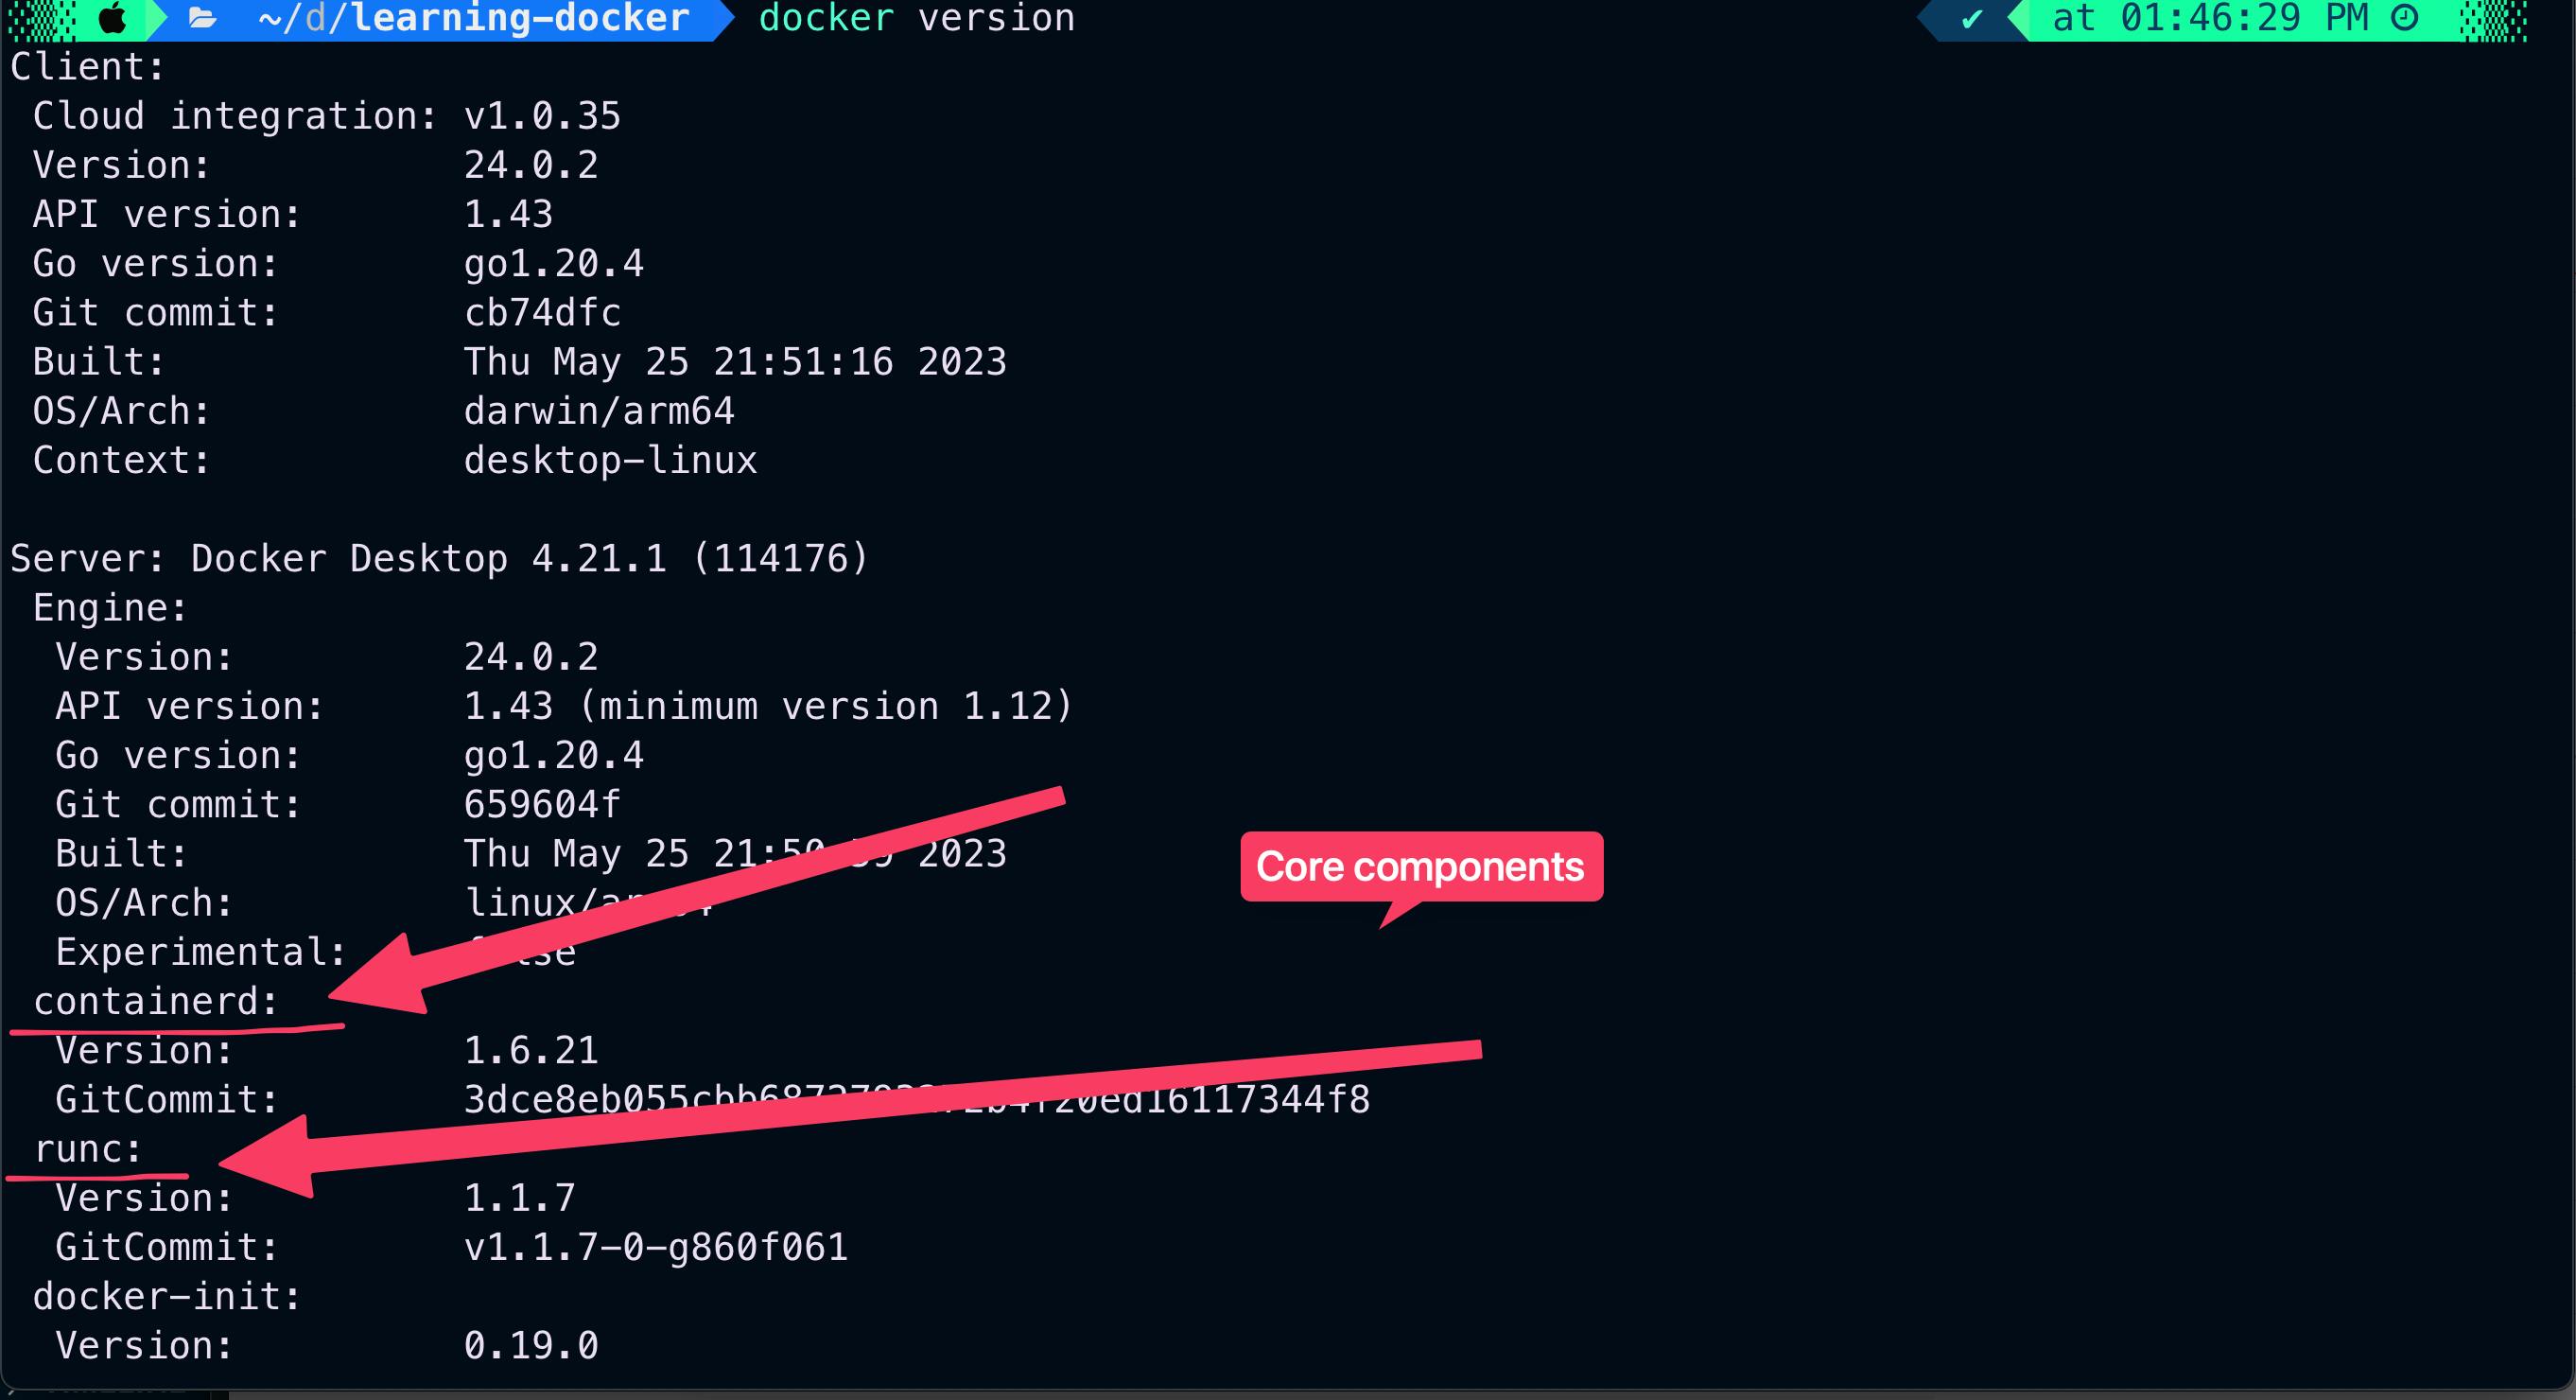
Now, let's try to understand containerd and runc, 2 core components of any container application
Runc and Containerd are both open-source tools for managing containers, but they serve slightly different purposes.
Runc
containerd
- The Docker client and daemon communicate using a REST API, over UNIX sockets or a network interface.

Docker Daemon
The Docker daemon (dockerd) listens for Docker API requests and manages Docker objects such as images, containers, networks, and volumes. A daemon can also communicate with other daemons to manage Docker services.
Docker Client
The Docker client (docker) is the primary way that many Docker users interact with Docker. When you use commands such as, the client sends these commands to dockerd, which carries them out. The docker command uses the Docker API. The Docker client can communicate with more than one daemon.
Docker Registries
A Docker registry stores Docker images. Docker Hub is a public registry that anyone can use, and Docker looks for images on Docker Hub by default. You can even run your own private registry.
When you use the docker pull or docker run commands, Docker pulls the required images from your configured registry. When you use the docker push command, Docker pushes your image to your configured registry.
Dockerfile
A Dockerfile is a text document that contains all the commands a user could call on the command line to assemble an image
Let's clone the project: https://github.com/docker/getting-started-app and create a Dockerfile in the root of the application and replace with the below content
# Dockerize Node.js application
FROM node:18-alpine

WORKDIR /app

COPY . .

RUN yarn install --production

CMD ["node", "src/index.js"]

EXPOSE 3000
Let's break each of the commands, # are used to write comments
FROM:
FROM [--platform=<platform>] <image> [AS <name>]
Will set the base image for the container, it will pull images from public repositories
WORKDIR:
WORKDIR /path/to/workdir
create a working directory inside your base image, think it as creating a folder for your code inside a new environment.
COPY:
COPY <src> <dest>
copies new files or directories from <src> and adds them to the filesystem of the container at the path <dest>.
CMD:
CMD ["executable","param1","param2"]
there can only be one CMD in the Dockerfile If more than one then only the last CMD will take effect.
The main purpose of a CMD is to provide defaults for an executing container.
EXPOSE:
EXPOSE <port> [<port>/<protocol>...]
The EXPOSE instruction informs Docker that the container listens on the specified network ports at runtime. You can specify whether the port listens on TCP or UDP, and the default is TCP if the protocol is not specified.
Now, let's run our first container
docker build -t getting-started .
By running build command you are instructing the docker daemon to bundle up your application as an image of the current directory( . signify that) and -t add a tag to it (think like the name of the image) getting-started
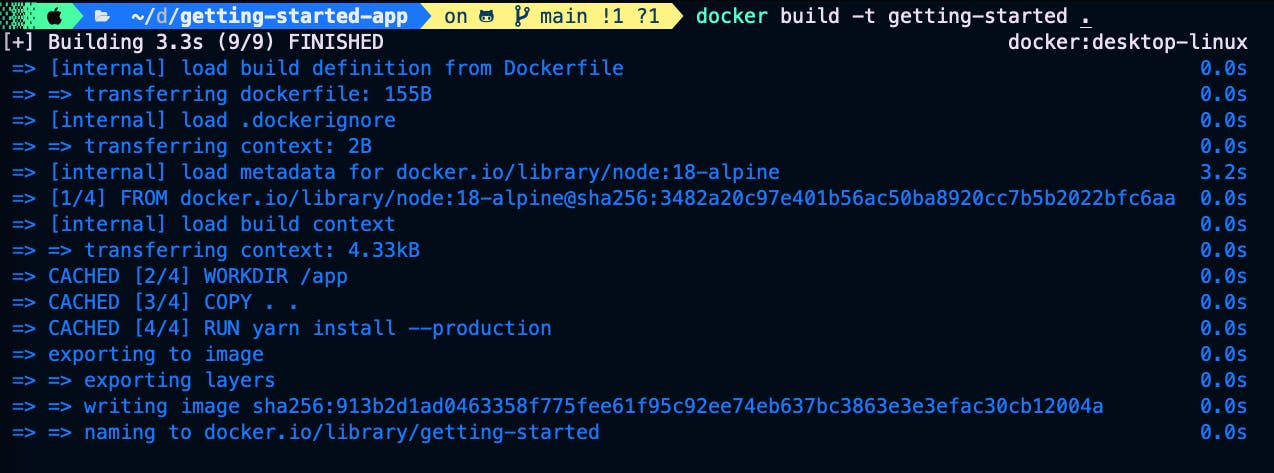
You can check all the images present in your system by running docker images

Now, it is time to run the container against your getting-started image
docker run getting-started
run will create a container against getting-started the image that you just created.

You will notice that your cursor is stuck after running this. Why is this so?
docker ps and use docker stop <container-id> stop the container
When you run your container docker defaults to foreground mode which attaches the console to the process inside your container's standard input, output and standard error, which makes it appear as if your terminal is "hanging". To prevent this you should start a container in detached mode by specifying -d=true or just -d the option.

The command will return the complete docker ID which can be used to stop or kill the container in future. Or you can use docker ps to see the complete list of running container
If you hit the http://localhost:3000 you will not receive any output because the you expose port of docker and as you learned earlier Docker containers are isolated environments from the host machine, so your network call won't work here.
For this, we have a special tag in the docker run command i.e. --port or -p which is used for port binding of the Docker container with the host
The -p flag takes a string value in the format of HOST:CONTAINER, where HOST is the address of the host, and CONTAINER is the port on the container.

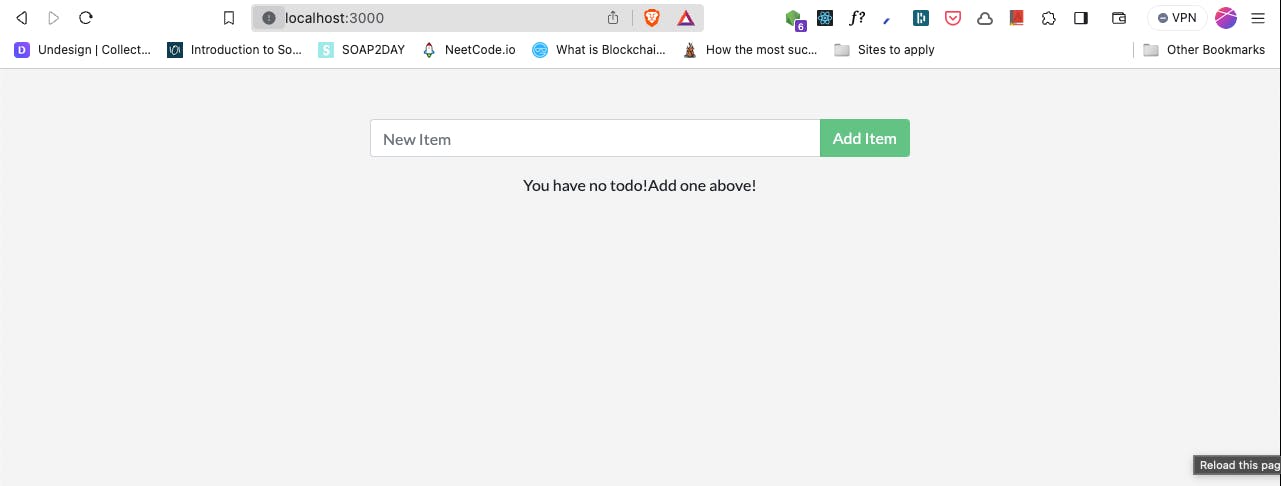
After a few seconds, open your web browser to http://localhost:3000. You should see your app.
Sharing your Image
For sharing our image with the rest of the world, we can make use of Docker Hub
Create an account
Select the Create Repository button.
For the repository name, use
getting-started. Make sure the Visibility is Public.Select Create.
docker push <your-username>/getting-started